Share a dumb printer in the network
I had an AirPrint enabled printer in the past and it was really nice, until it died (printers usually dies), something like the "print head" is broken and the replacement of this part costs more than a new printer.
After some research I found a cheap printer (Epson L3150) with "EcoTank" technology (you don't need ink cartridges, you can refill it's tanks with ink in bottles). It's WIFI enabled, but uses a propietary system to print through WIFI, as expected. The problem is that this works randomly.
Not sure if it's something in my network or something in the printer drivers, or it simply don't works as expected. As you may guess, it doesn't works when you need it.
So, let's fix it.
We need:
- a Raspberry Pi
- a WIFI USB dongle
- and a printer USB cable.
Setup Raspberry Pi
First, I'm going to use DietPi for easy setup and software management.
Follow DietPi instructions to set it up and connect to your wifi (or you can simply connect it through Ethernet).
Install printer drivers
You'll need to install the printer drivers, in my case I downloaded the ESC/P-R Driver (generic driver) for Linux for my specific printer model. Try to get the one for ARM architectures, not i386.
If the driver is a file with .deb extension, then you can install it with sudo apt install <driver name>.deb.
In my case the file is called epson-inkjet-printer-escpr_1.7.22_armhf.deb.
Install CUPS
CUPS is a printing system developed by Apple to enable exposing dumb printers to a network and enable Shared Printing.
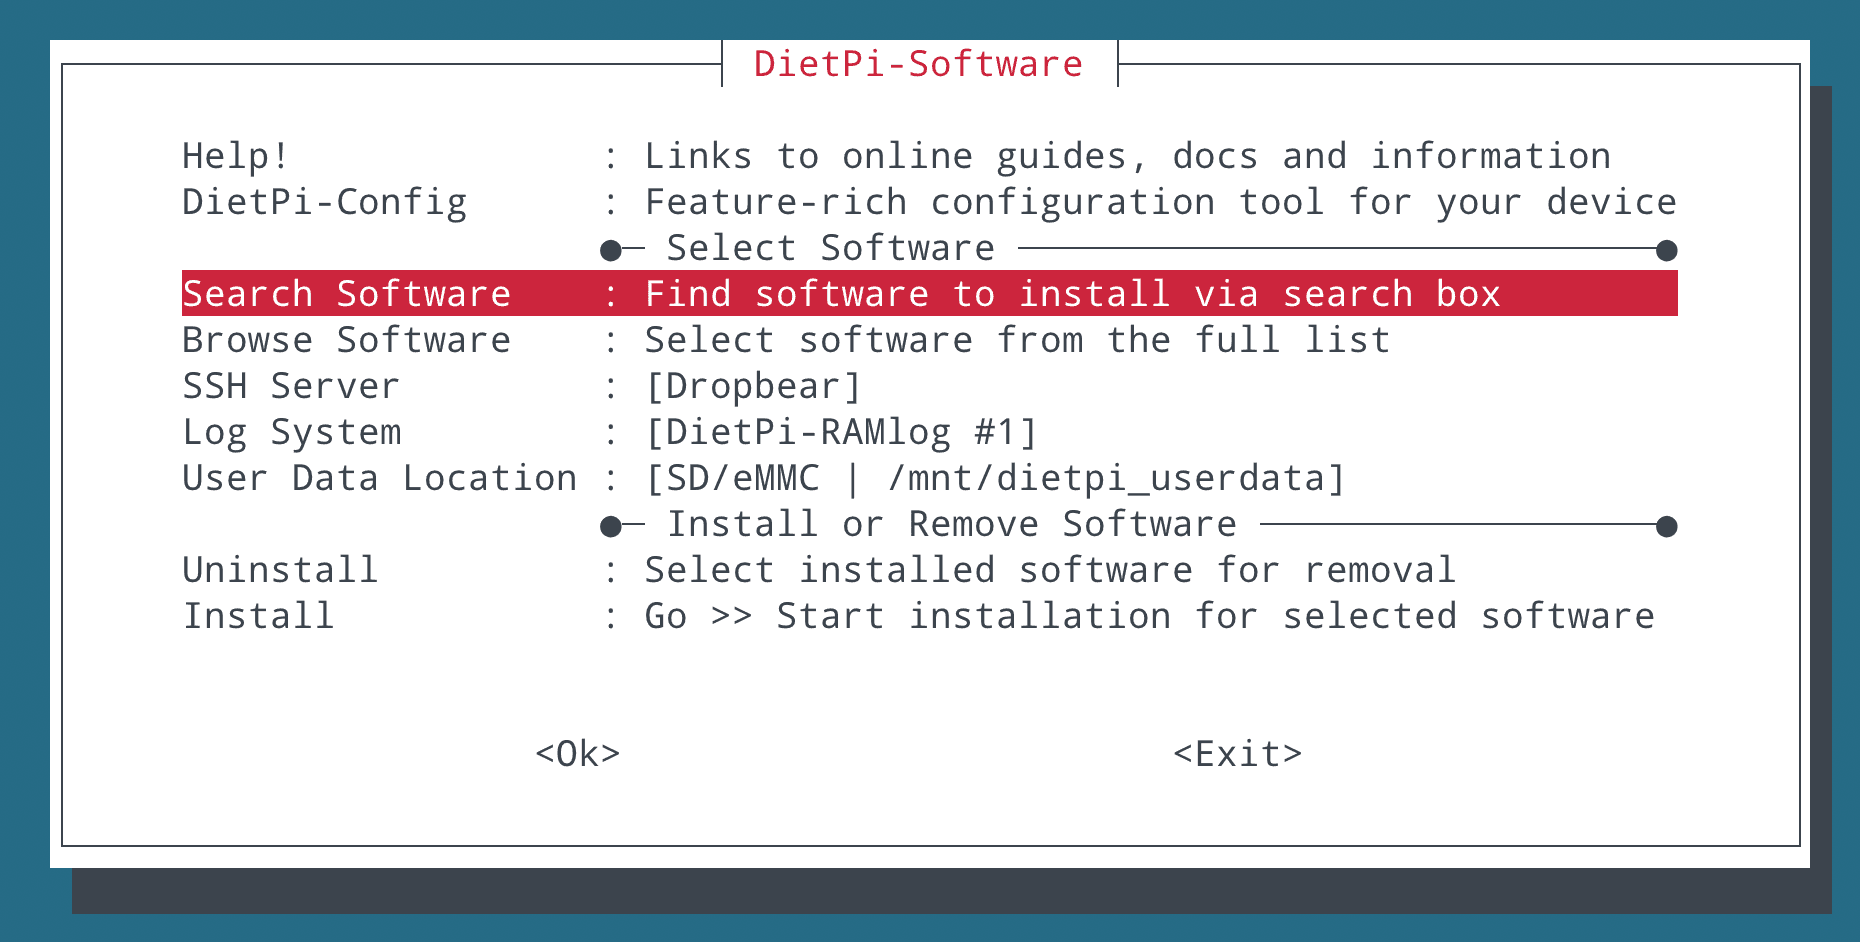
To do that you can simply use DietPi Software installer:
- Run
dietpi-software - Go to
Search Software, and search forcups - Select
CUPS: common UNIX printing system(using space bar) and press Enter to add this software to the install queue. - Go to the last item
Installand wait until the install is ready.
Restart your Raspberry Pi to ensure all software is running correctly.
Configure CUPS
Open this URL in your browser: http://<raspberry-pi-ip-address>:631/
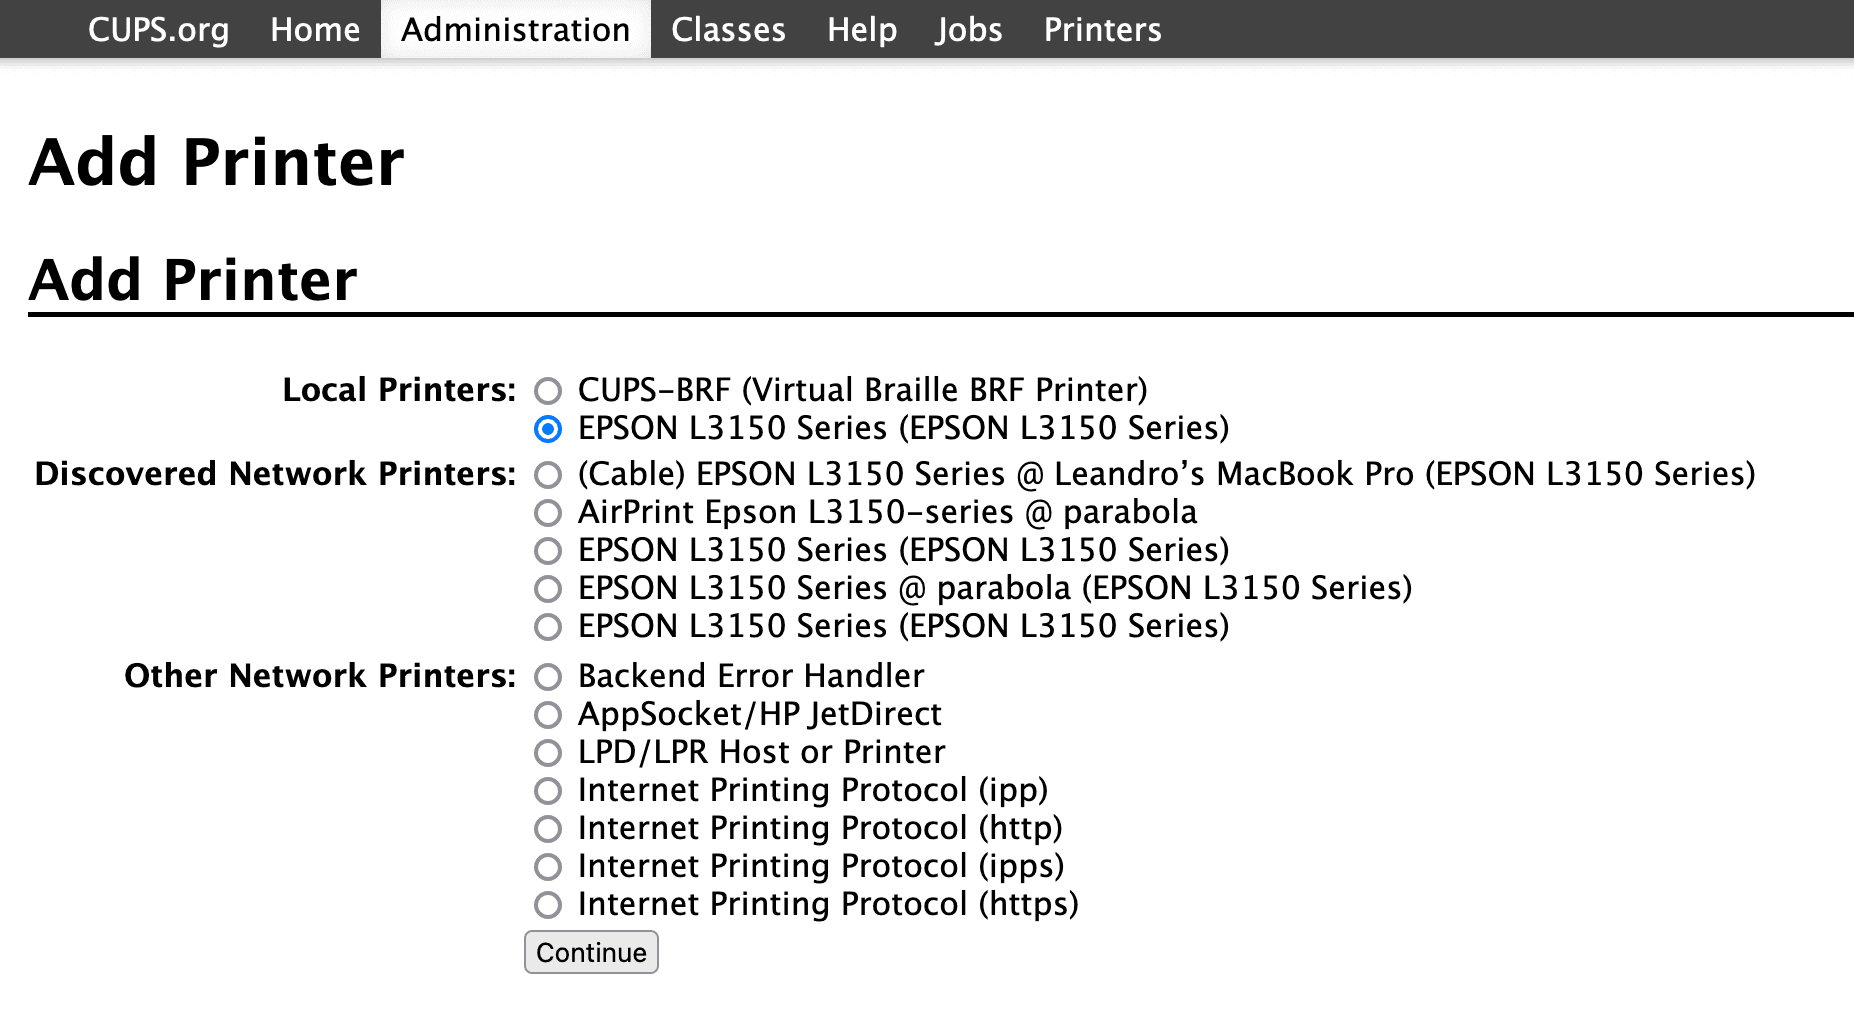
Go to Administration and click in Add Printer. If it asks for a user password, it's your Raspberry Pi user login, usually root / dietpi.
You'll get a list of found printers (locally and in the network). If your driver was correctly installed and the printer is connected to the Raspberry Pi it should be displayed in the Local Printers:
In the next step set the printer name and check the Share This Printer checkbox to allow access the printer from any computer in the network.
Using it
Now you should be able to see the printer in the list of printers of the print dialog in your operative system. In MacOS, the first time I select the new printer, it does something in the background that I assume was install the required drivers for that printer, and became usable in less than a minute.
Hope this helps!