If you grew up dialing into BBSes, you probably remember the experience of watching ANSI art load over a modem connection — characters filling the screen line by line, colors and shapes slowly revealing themselves. It was mesmerizing in a way that’s hard to explain to anyone who wasn’t there.
I spent a lot of time in that world. And every now and then I find myself browsing 16colo.rs, the archive that preserves decades of ANSI and ASCII art from the BBS scene. One day, while staring at my Mac’s screensaver, the idea clicked: what if it could show that art instead?
For those unfamiliar: ANSI art is a form of digital art created using text characters and escape codes — the kind you’d see on bulletin board systems (BBSes) in the late 80s and 90s. Artists used the limited palette of 16 colors and the CP437 character set to create surprisingly detailed illustrations, logos, and animations. Think pixel art, but made entirely of text characters.
16colo.rs has an incredible archive of this art, organized by group and release pack. It’s worth a visit even if you’ve never seen a BBS in your life.
What it does
ansi-saver is a macOS screensaver that streams ANSI art from 16colo.rs packs or from local folders on your machine. It downloads the art, renders it, and scrolls through the pieces with smooth 60fps animations powered by Core Animation.
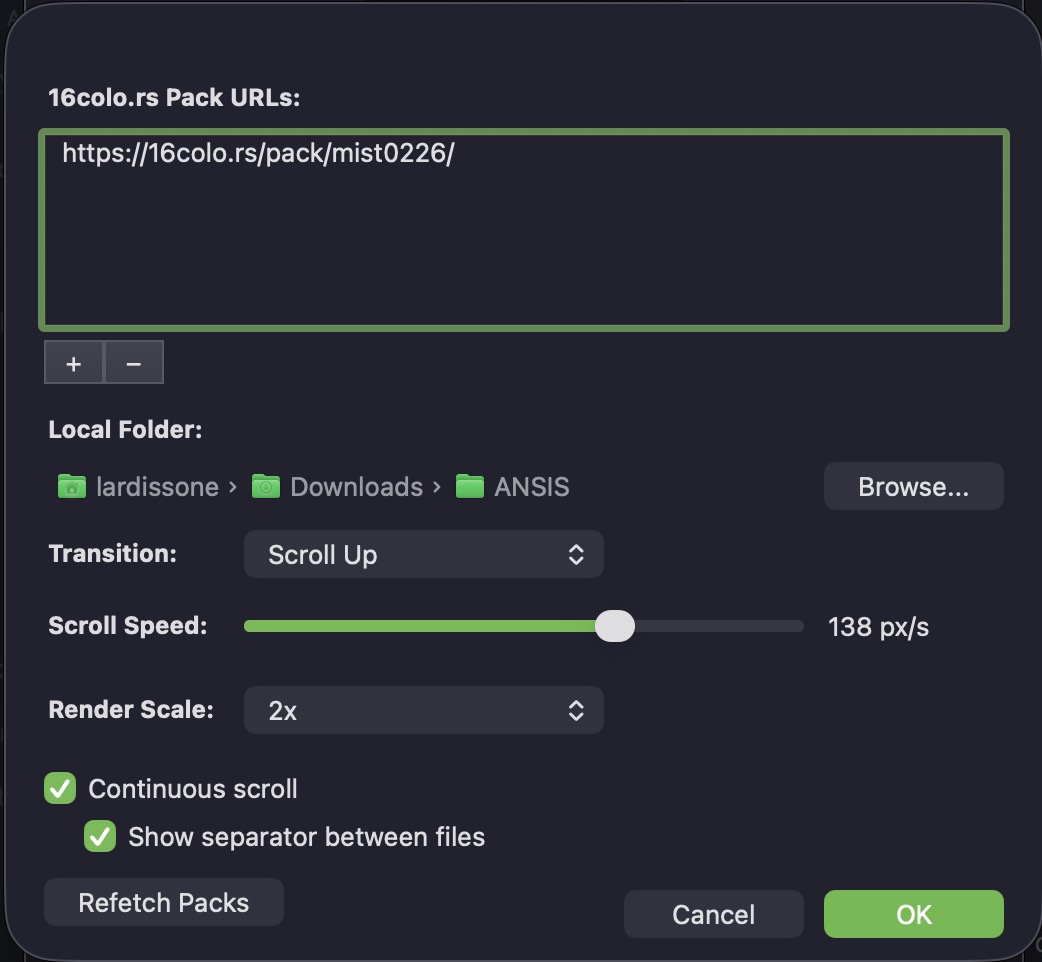
It supports multiple file formats from the scene: .ANS, .ICE, .ASC, .BIN, .XB, .PCB, and .ADF. You can configure the scroll speed and direction, transition style (scroll or crossfade), render scale (1x to 4x, useful for Retina displays), and whether to show filename separators between pieces.
The ansi-saver configuration panel, showing options for scroll speed, transition style and render scale
There’s also a continuous scroll mode that stacks multiple artworks vertically, creating an endless stream of art — like scrolling through a BBS that never ends.
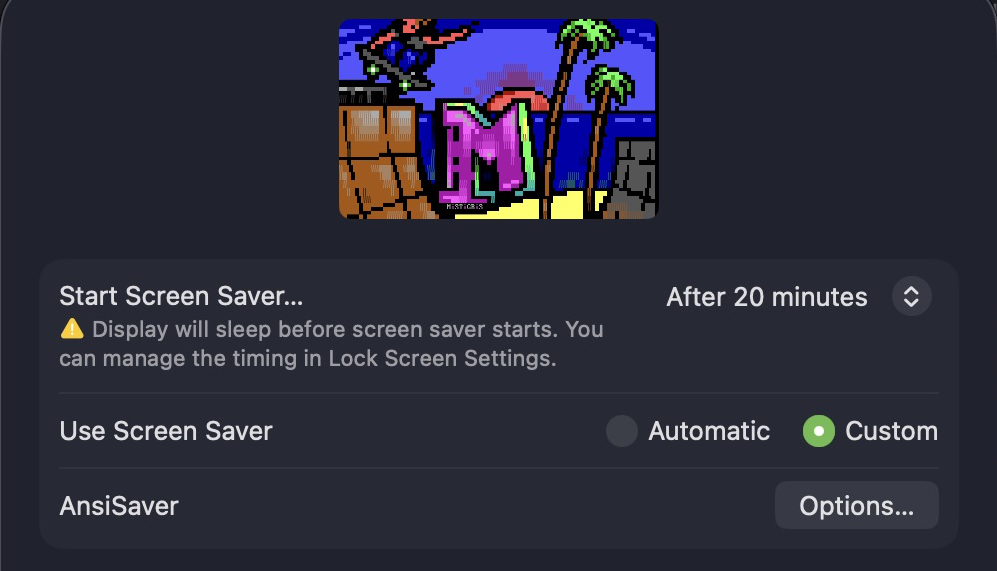
ansi-saver running, showing ANSI art rendered full screen
Here’s a quick demo of it in action:
How it’s built
I wrote it in Swift, which is not my usual language. That was part of the appeal — a nice challenge outside my comfort zone.
The core rendering is handled by libansilove, a C library that renders ANSI art files to images using the authentic CP437 fonts. I vendored it as a git submodule and integrated it via a bridging header. Getting Swift and C to play nicely together was one of the more interesting parts of the project.
The rendering pipeline is straightforward: download a pack from 16colo.rs (or read files from a local directory), feed each file through libansilove to generate a PNG, then display it using Core Animation layers. Files are rendered on demand to keep memory usage reasonable — there’s no point rendering a whole pack upfront when the screensaver shows one piece at a time.
Try it out
If you have an Apple Silicon Mac running macOS Tahoe or later, you can grab it from the GitHub releases. Download the zip, unzip, double-click to install, and approve it in System Settings > Privacy & Security.
I’ve been using iTerm2 for many years now, but noticed that I was not using it to its full potential.
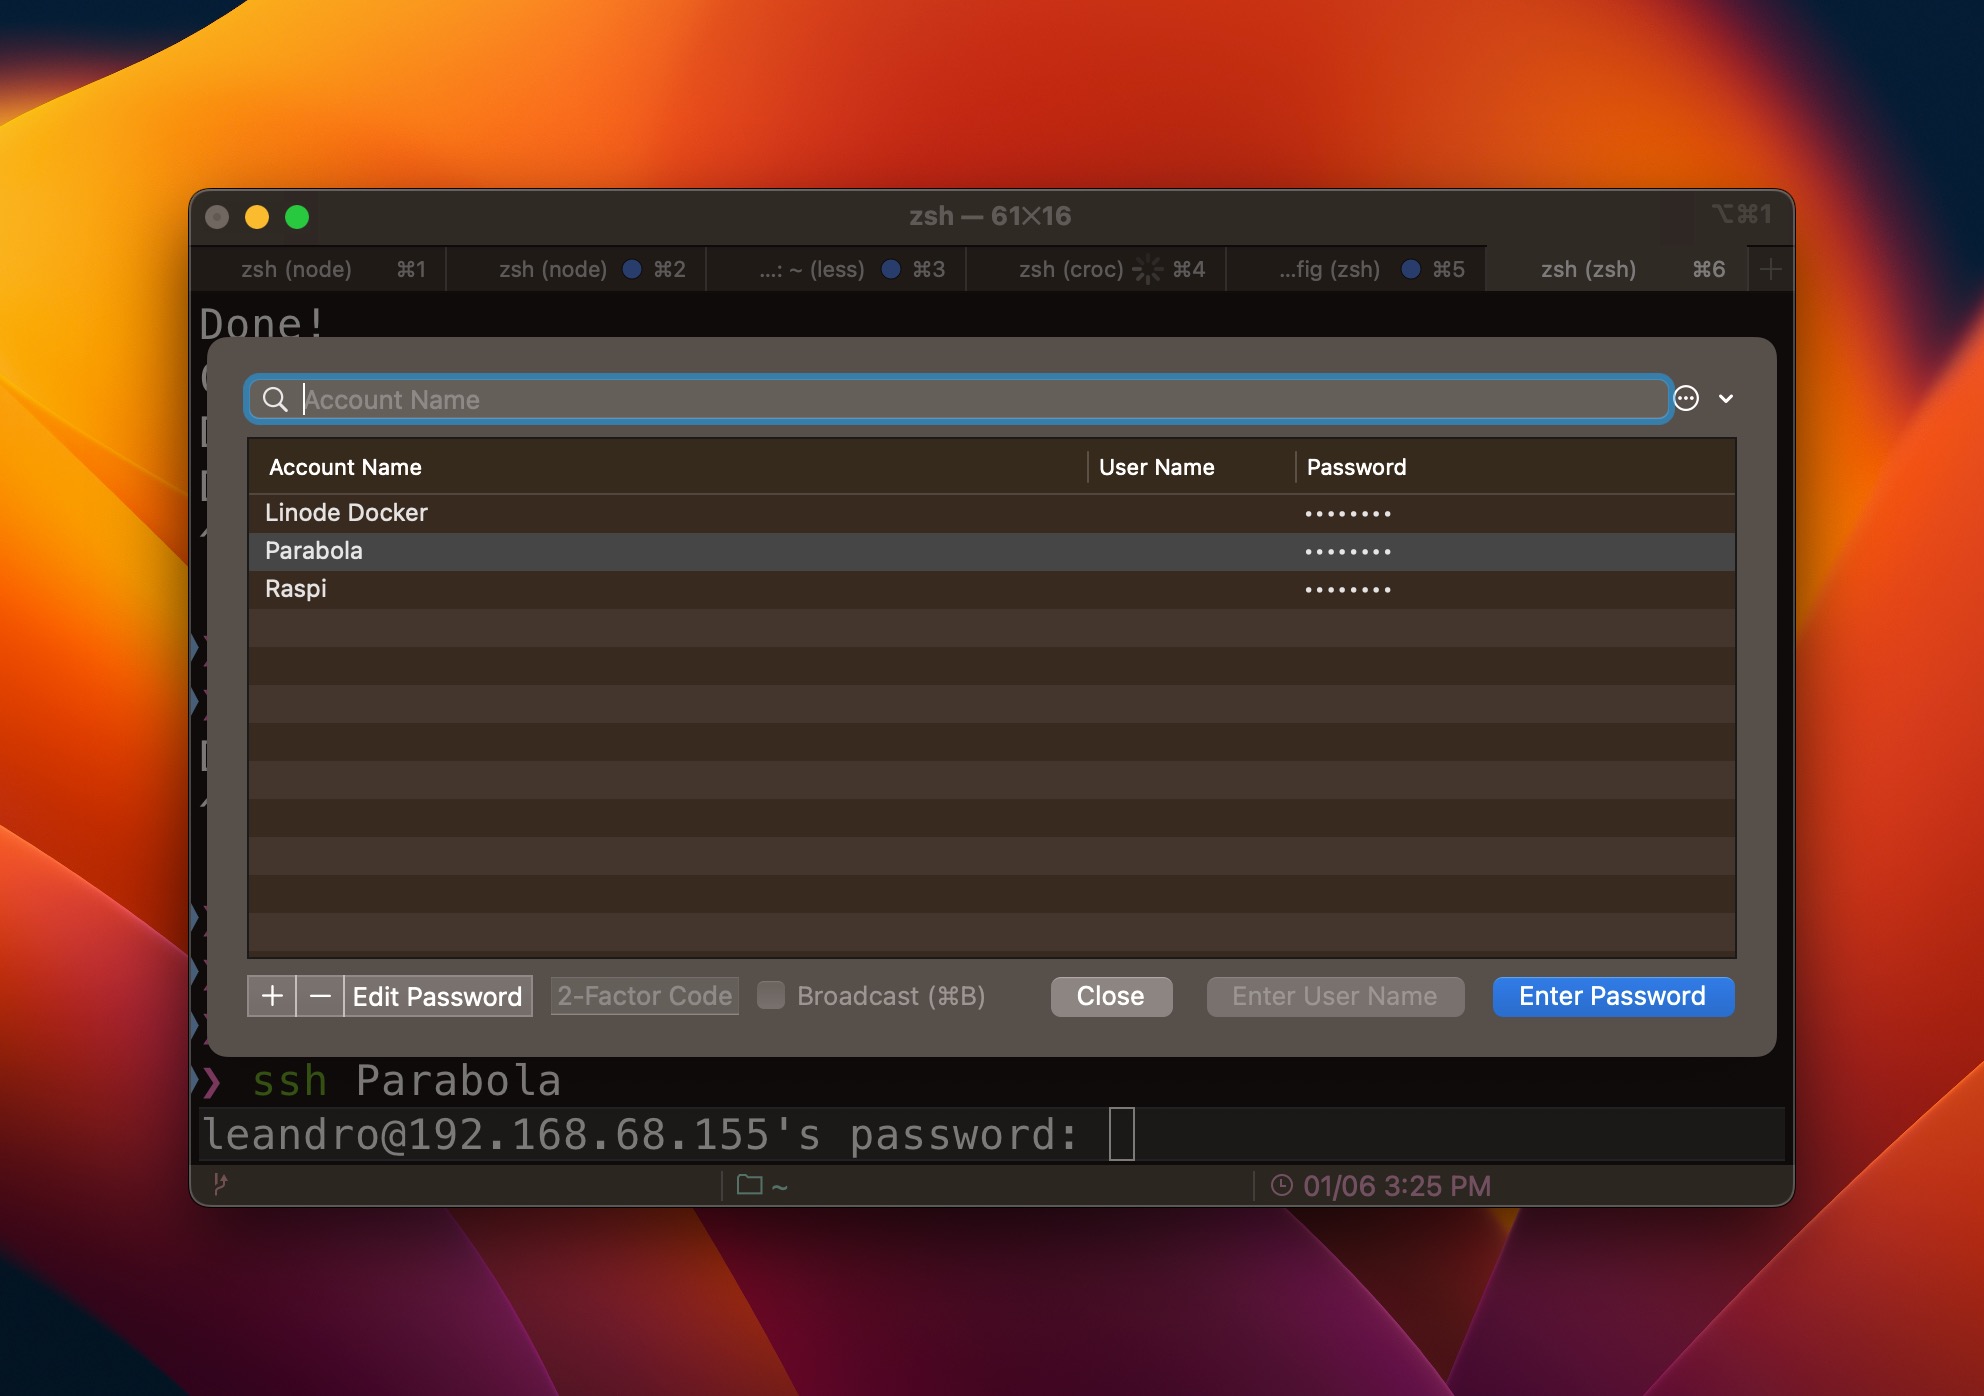
There’s a feature in iTerm2 called triggers that allows you to run a command when a specific text is printed in the terminal. I’ve been using it to automatically fill my password when I ssh into a server.
How to use it
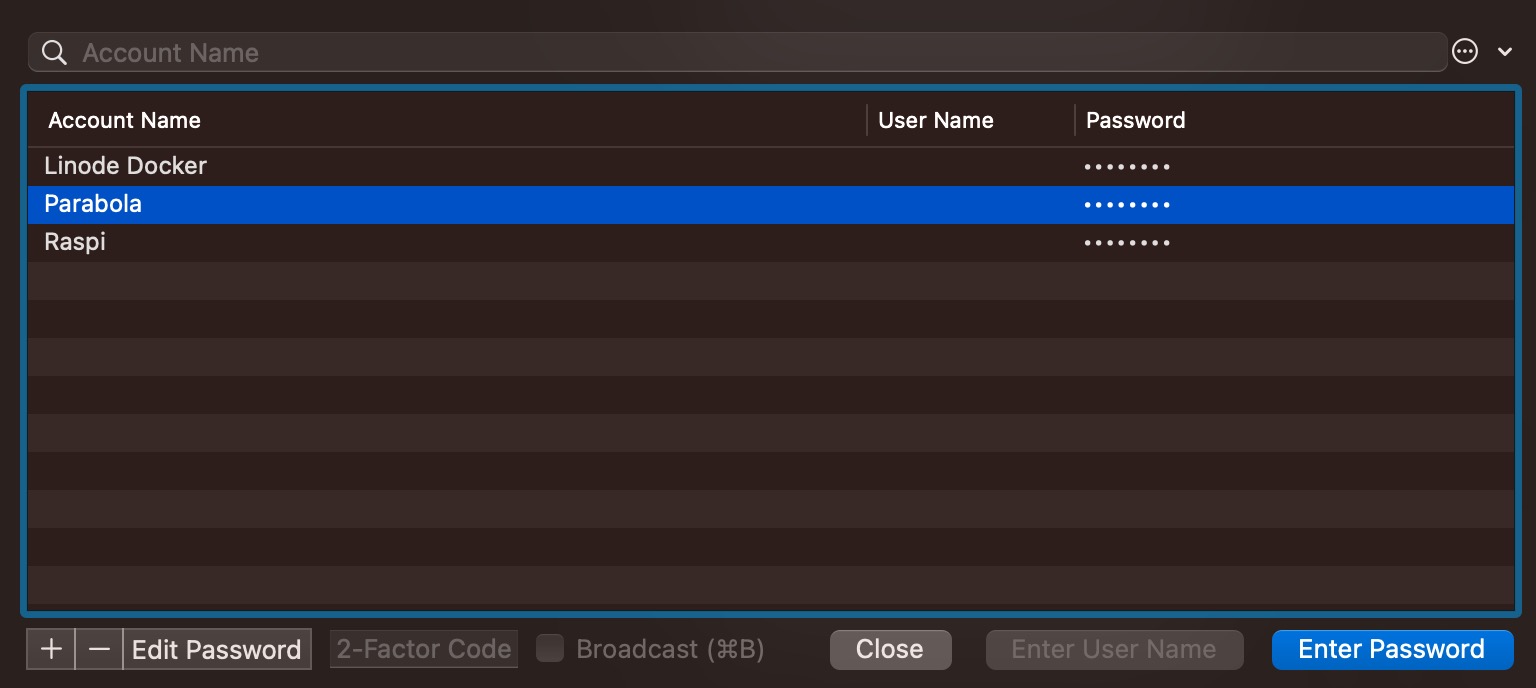
First, you need to add a new password to iTerm. Go to Window > Password Manager and click on the + button to add a new password.
Create new password
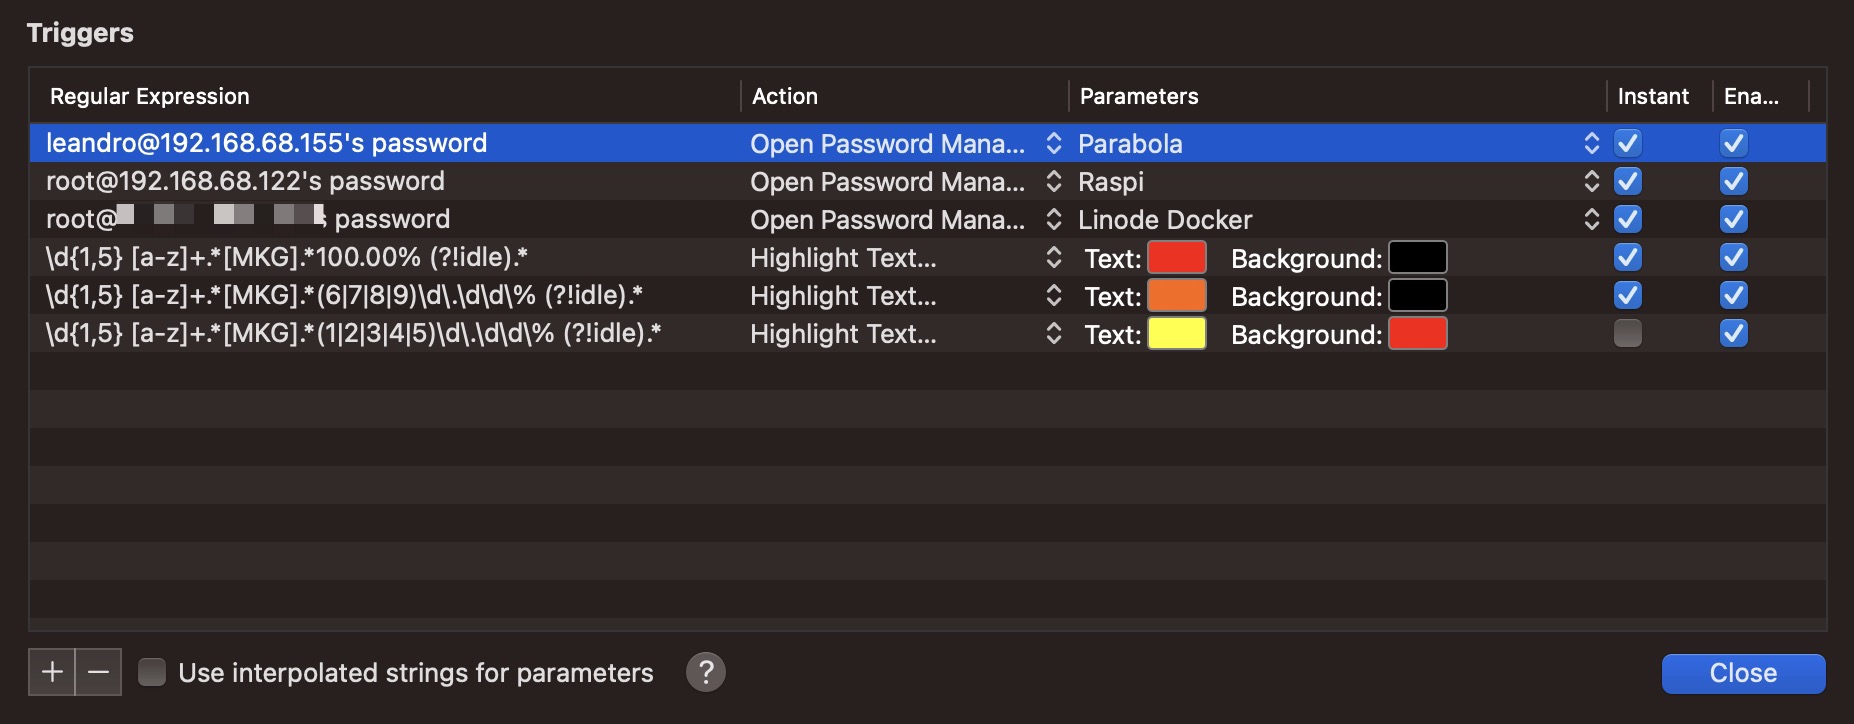
Second, you need to create a new trigger. Go to Preferences > Profiles > Advanced > Triggers and click on the + button to create a new trigger.
Then, you need to fill the trigger with the following information:
Parameters: select the password you created in the previous step
Create new trigger
Now, when you ssh into a server, iTerm will open the Password Manager with the password you created selected and you just need to press Enter to fill the password.
I think voice messages in instant messengers are a nice feature, but a voice message of 6 minutes is a pain. When you listen to it? Where are the key parts of the messages?
For that reason I’ve been working on a Telegram chat bot to transcribe these audio messages.
You just need to forward the message to the bot and it automatically sends the audio to OpenAI servers to transcribe and return the message as text to the chat.
Prerequisites
A Telegram bot. You can get one using BotFather in Telegram. More info here: How do I create a bot?
The list of Telegram users allowed to use the bot. To avoid large bills from OpenAI! You can get your chat ID by talking to this bot: IDBot
Clone the repository: git clone https://github.com/lardissone/telegram-ai-bot.git
CD into the cloned repository: cd telegram-ai-bot
Copy settings.example.py to settings.py: cp settings.example.py settings.py
Fill the corresponding information in the settings.py file. You’ll need to enter OPENAI_API_KEY, TELEGRAM_BOT_TOKEN and TELEGRAM_CHAT_IDS.
Run it by using Docker’s compose: docker compose up -d
Usage
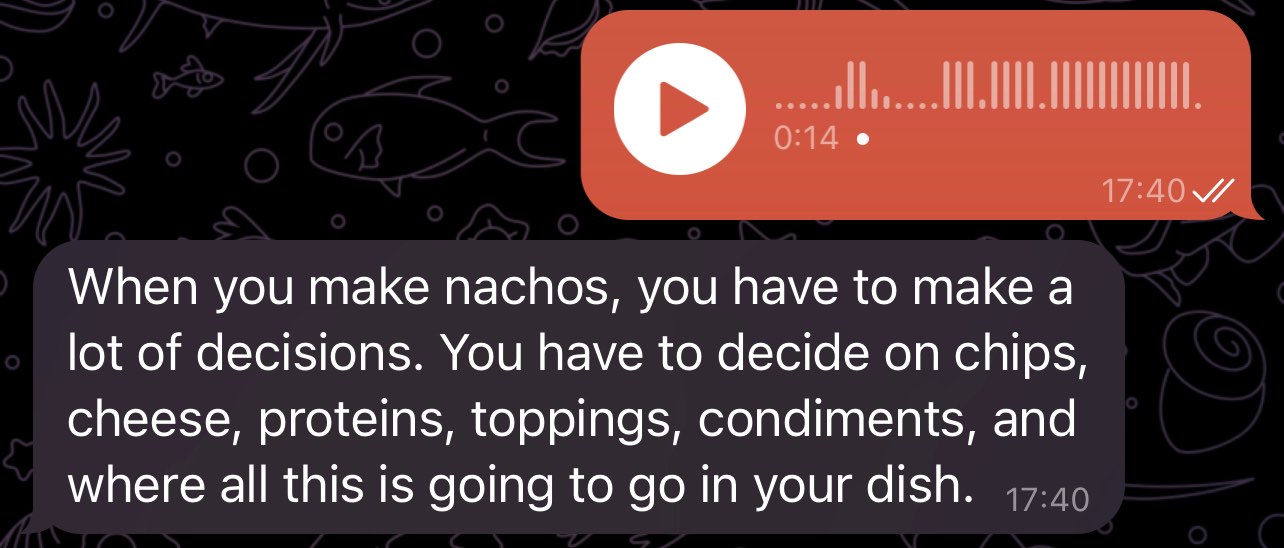
You just need to send the bot a voice message and it automatically will transcribe for you.
Response from the bot
Note: I tried with English and Spanish, and both worked perfectly.
Tip
I’ve also used it for sending a text message when I’m on the car, by just sending a voice message directly to the bot and then forwarding the resulting text to my contact.
It also includes a quick command called /image to generate a image using DALL-E. You just need to send /image prompt where the prompt is what you want the AI create for you.
I had an AirPrint enabled printer in the past and it was really nice, until it died (printers usually dies), something like the “print head” is broken and the replacement of this part costs more than a new printer.
After some research I found a cheap printer (Epson L3150) with “EcoTank” technology (you don’t need ink cartridges, you can refill it’s tanks with ink in bottles). It’s WIFI enabled, but uses a propietary system to print through WIFI, as expected. The problem is that this works randomly.
Not sure if it’s something in my network or something in the printer drivers, or it simply don’t works as expected. As you may guess, it doesn’t works when you need it.
You’ll need to install the printer drivers, in my case I downloaded the ESC/P-R Driver (generic driver) for Linux for my specific printer model. Try to get the one for ARM architectures, not i386.
If the driver is a file with .deb extension, then you can install it with sudo apt install <driver name>.deb.
In my case the file is called epson-inkjet-printer-escpr_1.7.22_armhf.deb.
Install CUPS
CUPS is a printing system developed by Apple to enable exposing dumb printers to a network and enable Shared Printing.
To do that you can simply use DietPi Software installer:
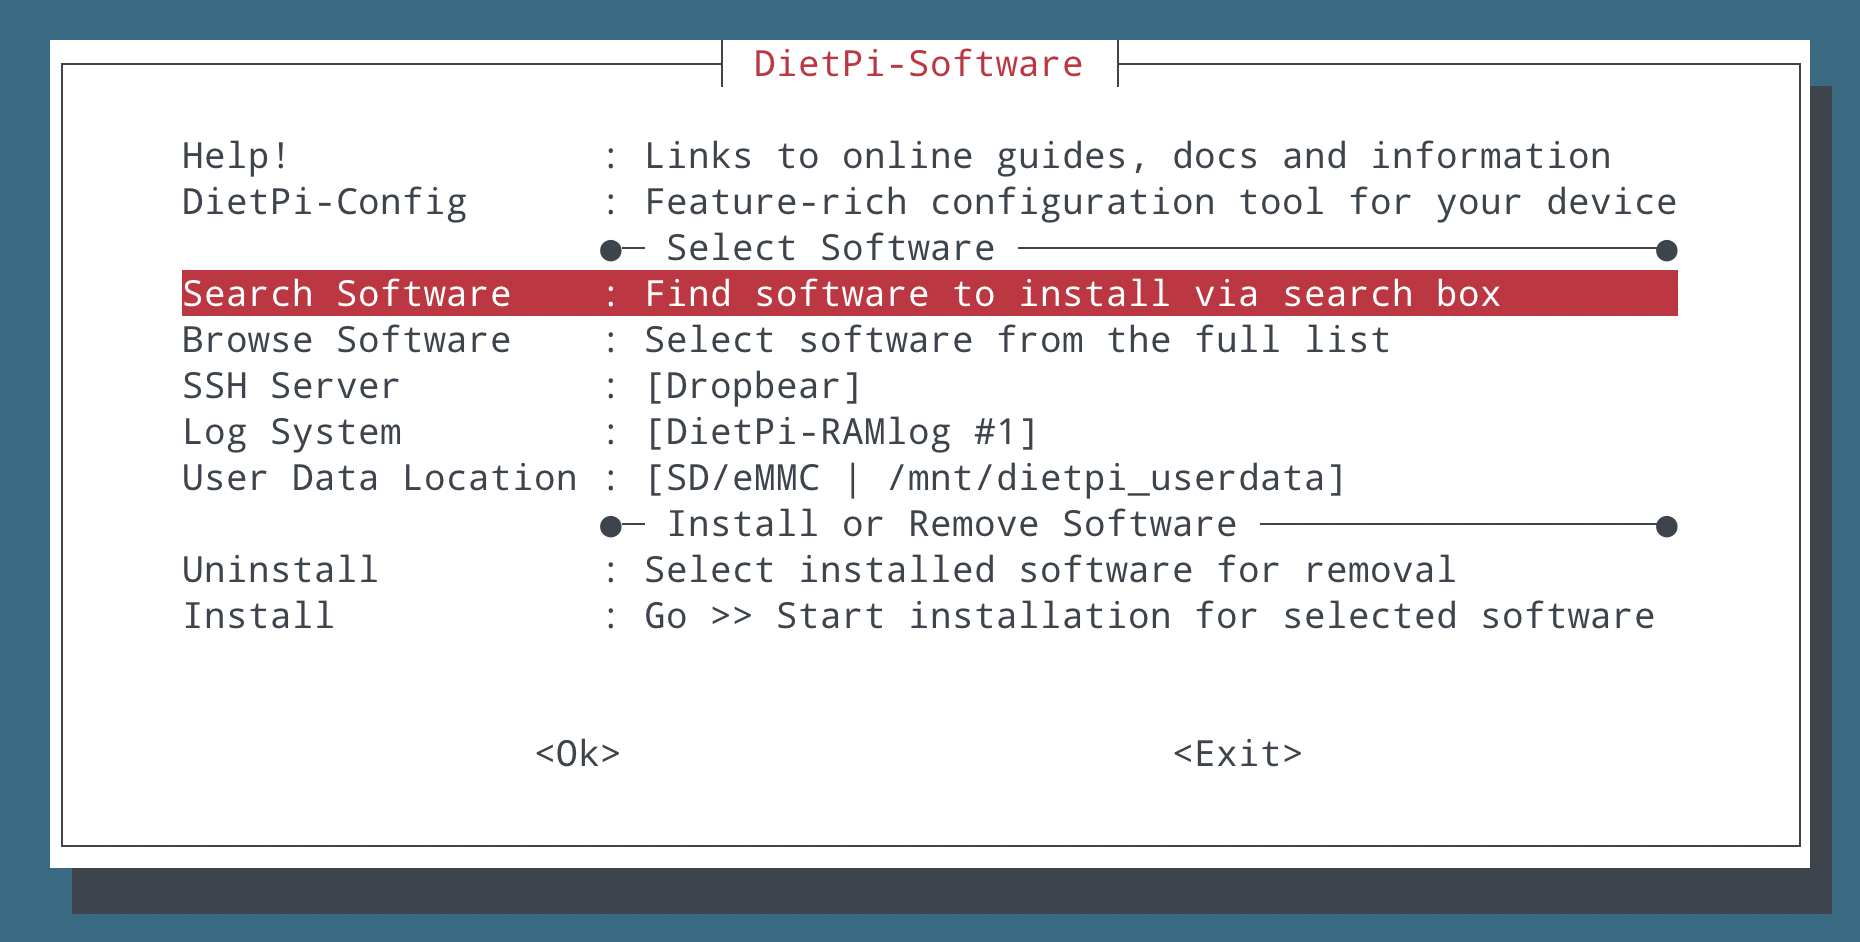
Run dietpi-software
Go to Search Software, and search for cups
Select CUPS: common UNIX printing system (using space bar) and press Enter to add this software to the install queue.
Go to the last item Install and wait until the install is ready.
DietPI interface to install CUPS
Restart your Raspberry Pi to ensure all software is running correctly.
Configure CUPS
Open this URL in your browser: http://<raspberry-pi-ip-address>:631/
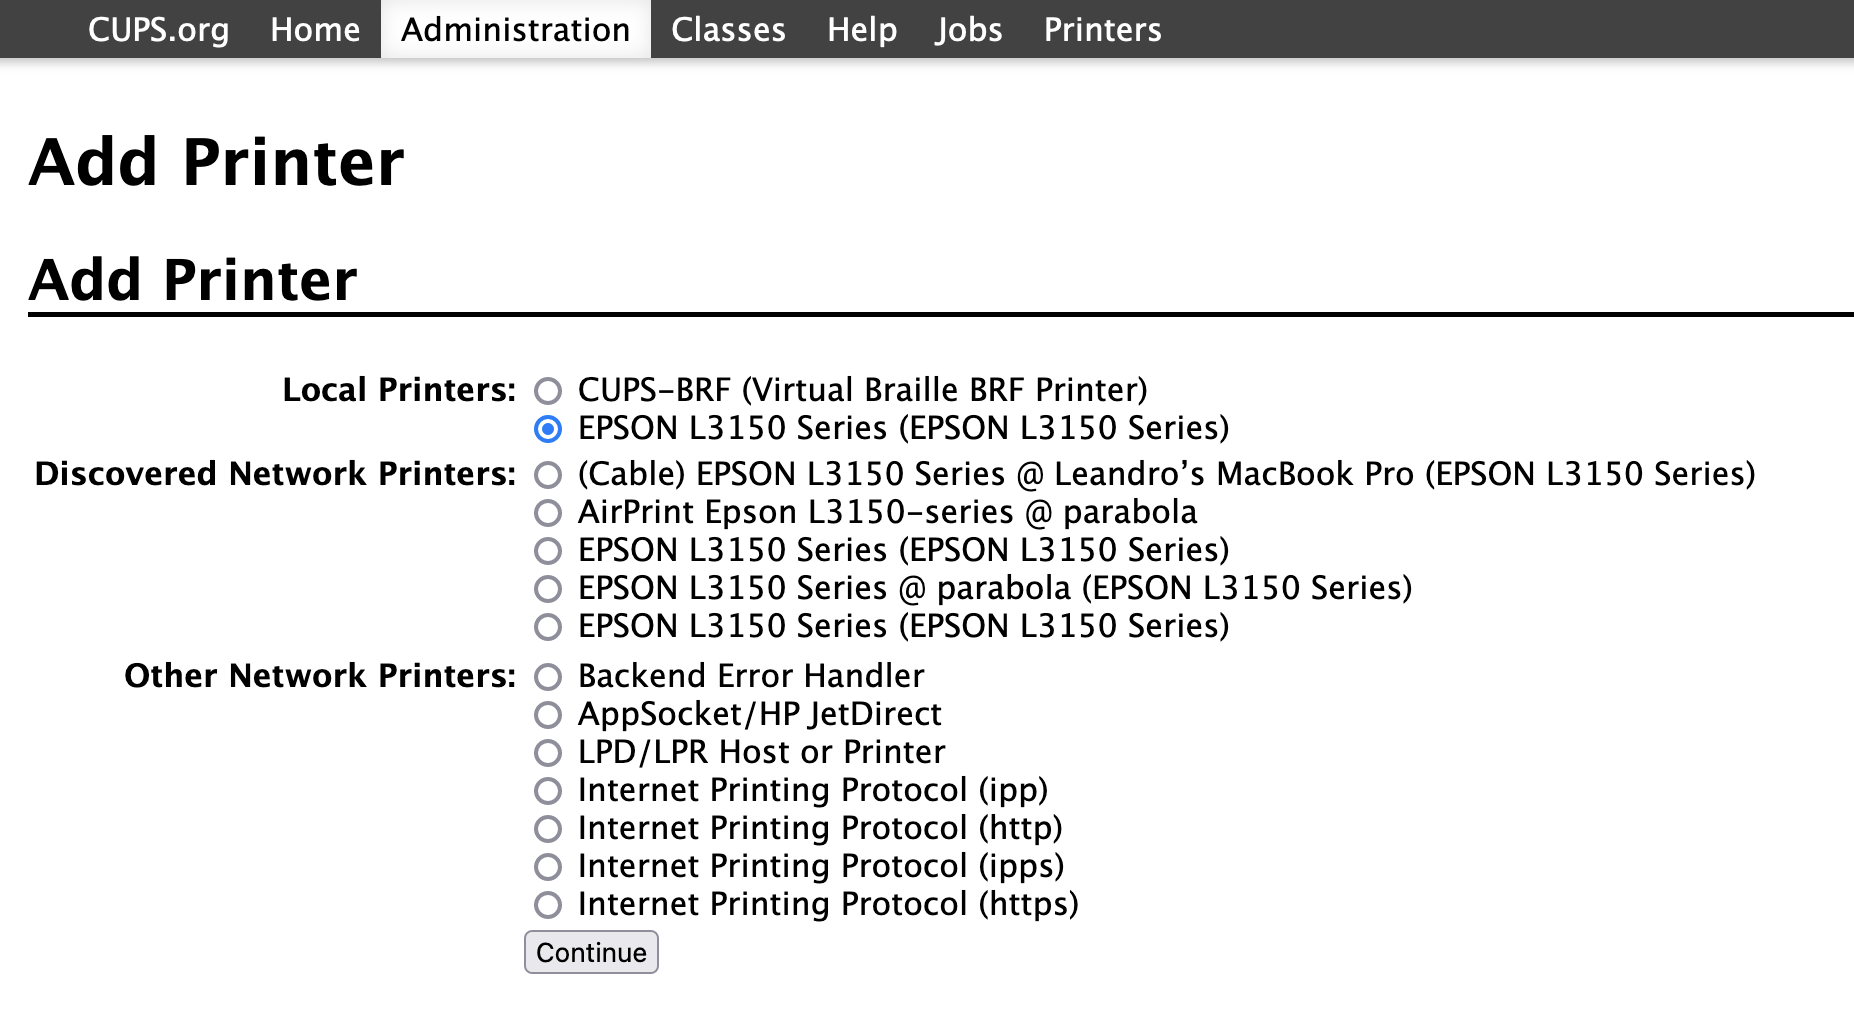
Go to Administration and click in Add Printer. If it asks for a user password, it’s your Raspberry Pi user login, usually root / dietpi.
You’ll get a list of found printers (locally and in the network). If your driver was correctly installed and the printer is connected to the Raspberry Pi it should be displayed in the Local Printers:
Configure CUPS
In the next step set the printer name and check the Share This Printer checkbox to allow access the printer from any computer in the network.
Using it
Now you should be able to see the printer in the list of printers of the print dialog in your operative system. In MacOS, the first time I select the new printer, it does something in the background that I assume was install the required drivers for that printer, and became usable in less than a minute.